Migrating your WordPress site to a new host can be intimidating, especially when you’re concerned about downtime or losing important data. While it’s possible to migrate manually, you need to understand that manual migrations can be complex, particularly when you’re aiming to maintain uptime. This requires careful planning and execution, especially for high-traffic websites where even milliseconds of downtime can result in significant user loss. For enterprise sites with billions of monthly pageviews, delays in database sync can impact thousands of users.
While manual migration offers complete control, it demands technical expertise in database management, file transfers, and DNS configuration. This makes it an important skill to have, but if you’re running a high-traffic site that can’t afford issues, it’s often best to leave this process in the hands of experts. That’s why we recommend using your hosting provider’s free migration service if available. However, if you’re ready to take control and learn the process, we’ll guide you through how to migrate your WordPress website to a new host manually, step by step.
How to manually migrate your WordPress site to a new host
Migrating your WordPress site to a new host requires careful planning and attention to detail across several technical areas. While it can feel like a big job, breaking the process into manageable steps makes it much more straightforward.
“Migration is all about getting the details right. It’s a process that requires focus, but when it’s done properly, it means the site stays up, performs well, and grows with your needs.”
Katie Stapley, VP of Client Success at BigScoots
Pre-migration preparation
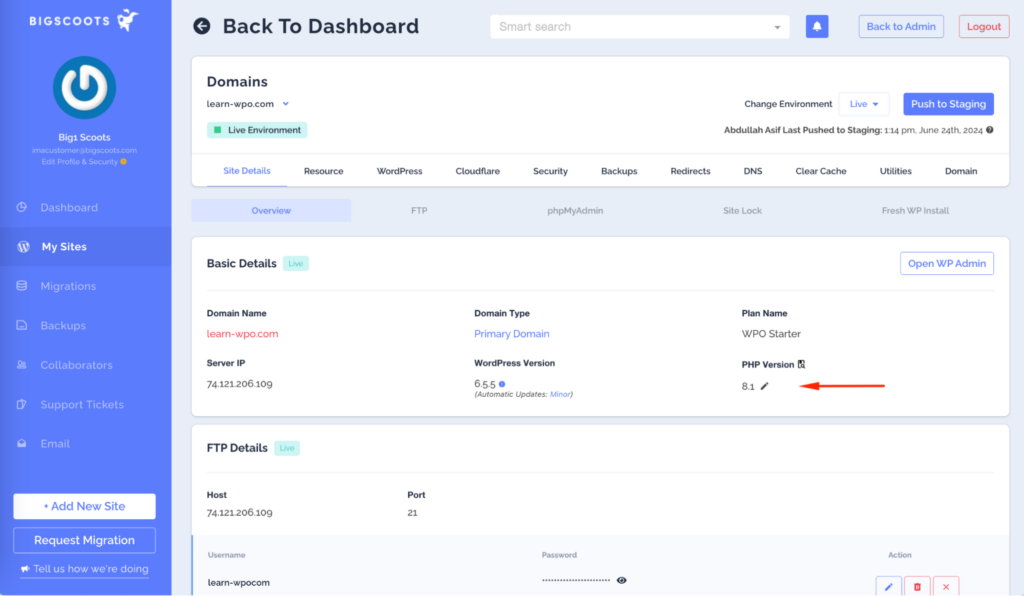
- Server environment comparison
Before you begin, check the PHP version, MySQL settings, and any other server configurations between your current and new host. This information should be available from the hosting control panels and should help you spot any compatibility issues early.
- Create a migration checklist and rollback plan
Make a detailed plan outlining every step of the migration. Also, create a backup plan in case something goes wrong and you need to restore the site. - Develop a maintenance window strategy
Pick the best time to migrate when traffic is lowest. This minimizes the impact on your users while you make the switch. - Verify hosting requirements and limitations
Double-check the technical specs of your new hosting environment. Make sure it can handle your site’s storage, bandwidth, and any other needs.
Backup and documentation
- Full site backup creation and verification
Create a complete backup of all your files and databases. Verify that the backups are intact and can be restored if needed. - Documentation of current server configurations
Record all server settings, including PHP configurations and Apache/Nginx settings, so you can apply the same configurations on the new server. - Recording of all DNS and domain settings
Document your DNS records, including A records, CNAME entries, and MX records. This will give you a smooth transition to the new host without breaking email or site access. - Cataloging of installed plugins and themes
Make a list of all active and inactive plugins and themes, along with their versions and settings. This will help with compatibility on the new server.
Database management
- Export strategy for large databases
Plan how to handle databases that are too large for standard export/import limits. Consider using tools like phpMyAdmin or command-line options to split the database if needed. - Handling of serialized data
Ensure serialized data is correctly migrated to avoid issues with widget settings and plugin options. This can prevent problems when the site is live. - Character encoding preservation
Check that the character encoding (like UTF-8) is preserved during migration to avoid content display issues on the new server. - Table optimization and cleanup
Clean up the database by removing unnecessary data and optimizing tables. This helps improve site performance after the migration.
File system operations
- Critical WordPress directory identification
Locate and organize directories like wp-content, wp-includes, and uploads. These are essential for your site’s functionality and need to be transferred carefully. - Media library transfer methodology
Plan how to efficiently transfer large media libraries while maintaining the folder structure. This makes sure there are no broken links or missing files after the move. - Permission structure maintenance
Make sure the correct file permissions are maintained during the transfer to prevent security issues on the new host. - Server-specific configuration files
Handle .htaccess, php.ini, and other server configuration files carefully. Make sure they are adapted to the new hosting environment!
Server configuration
- PHP version compatibility
Check that the PHP version on the new server matches your site’s requirements. Adjust settings if necessary for smooth operations. - Memory limit adjustments
Set the appropriate memory limits on the new server to make sure your site runs smoothly after migration. - Server-side caching setup
Implement the right caching mechanisms on the server to optimize performance, such as enabling object caching or opcode caching. - Web server configuration matching
Make sure the web server settings (Apache or Nginx) on the new server are aligned with the previous environment to avoid any inconsistencies.
Security implementation
- SSL certificate transfer
Make sure the SSL certificate is transferred to the new server and properly configured to maintain secure connections. - Security key regeneration
Update WordPress security keys in the wp-config.php file after migration for enhanced protection. - User permission preservation
Keep user roles and permissions intact during the database transfer to avoid access issues after migration. - Firewall rule migration
Transfer and adapt any existing firewall rules so the new server is properly secured.
Testing environment
- Staging site creation
Set up a staging site that mirrors the live site to test the migration before going live. This helps catch any issues early. - User role verification
Test all user roles and their associated permissions to make sure they work as expected in the new environment. - Plugin functionality testing
Check that all installed plugins work correctly in the new environment, making sure there are no conflicts or broken functionality. - Theme compatibility checking
Make sure your theme is fully compatible with the new host, and test it for any visual or functional issues.
DNS and domain management
- TTL adjustment timing
Lower the TTL (Time to Live) values in advance to speed up DNS propagation when you switch to the new server. - DNS record preparation
Prepare all necessary DNS records for the new server, including A records, CNAME entries, and MX records. - Domain propagation handling
Monitor the DNS propagation process and address any issues that arise to make sure the site points to the new server correctly. - Temporary URL implementation
Set up temporary URLs for testing the new server setup before making the final DNS switch.
Go-live process
- Final data synchronization
Perform a last sync of any new content or changes made after the initial migration to make sure everything is up-to-date on the new server. - DNS cutover execution
Update your DNS records to point to the new server, officially making the switch to the new host. - SSL certificate activation
Make sure the SSL certificates are activated and functioning correctly on the new server to maintain secure connections. - Cache clearing procedures
Clear all caches so fresh content is delivered to users once the site goes live on the new server.
Post-migration verification
- Content integrity checking
Verify that all content has transferred correctly and displays properly on the new server. - Form functionality testing
Test all contact forms and interactive elements to make sure they work as expected after migration. - Email system verification
Confirm that email functionality is working, including contact forms and system notifications. - Performance benchmark comparison
Compare site performance metrics before and after migration to make sure everything is running as expected.
⚠️ Remember
Migrating a WordPress site is a detailed process that requires thorough preparation and attention to every step. Take your time with each phase, and don’t rush the process. If you’re ever unsure, it’s always a good idea to consult with your hosting provider so the migration goes smoothly.
The pros and cons of migrating your WordPress websites with plugins
Plugins for WordPress migration have become popular tools for transferring websites between hosts or creating backups. Plugins like All-in-One WP Migration and Duplicator are known for their user-friendly interfaces, making the complex task of migrating sites easier for non-technical users.

However, when dealing with enterprise-level websites, there are some technical challenges to think about:
Challenge 1: Database management
Large databases often exceed standard import limits and may require splitting into smaller segments for reliable transfer. Enterprise websites with extensive content libraries need careful planning to make sure data is moved without issues.
Challenge 2: Server configurations
Migration plugins must manage varying timeout limits and execution times between different hosting environments. This is particularly important when transferring large media libraries or complex plugin setups.
Challenge 3: Security implementation
SSL certificates need to be handled carefully during migration to maintain site security. Making sure they are correctly configured on both the source and destination servers is essential.
Challenge 4: Multisite complexity
For WordPress multisite installations, the relationships between different sites need special attention. These sites rely on shared resources, and preserving these connections during migration is essential.
While migration plugins sound great in theory, they do have their limitations. Free versions often come with file size restrictions, and some plugins may not support all hosting providers. For advanced features like cloud storage integration, premium versions may be required.
Along with this, many hosting providers offer their own migration plugins. These are typically designed to ensure that your site is migrated properly to the specific infrastructure of your host, so the success rate is often higher than with most third-party plugins.
Move your website quickly with the BigScoots Migrator
For clients on Managed Hosting for WordPress plans, the BigScoots Migrator provides a fast and efficient way to handle your site migration. Available directly through the WPO portal, this tool is especially beneficial for agencies managing multiple client sites or multi-site setups.
With an industry-leading success rate of 99%, BigScoots Migrator is one of the most reliable migration tools available. Built entirely in-house, it offers a custom solution – no white-labeled products here! The tool is designed to be simple and user-friendly, requiring no complicated settings. Whether your team has technical expertise or not, anyone can use it to migrate a site whenever needed. The entire migration process is fully manageable from start to finish directly in the BigScoots portal, so there’s no need for external support.
BigScoots Migrator now supports sites running PHP 7.1 and above, expanding its eligibility even further.
This tool is exclusive to BigScoots and is only for migrating sites to BigScoots WPO. It’s not available for migrations to other hosts.
While you have complete control over the timing and execution of the migration, BigScoots can also handle the entire process for you if preferred. The choice is yours!
How BigScoots handles migrations for enterprise sites and custom requirements
When it comes to enterprise websites or sites with unique requirements, careful planning and expertise are a must to ensure everything goes smoothly. While migration plugins like BigScoots Migrate make it easy for sites on our Managed Hosting for WordPress plans, larger, more complex sites may require a more hands-on approach.
“Migration plugins are great for smaller sites or simpler migrations, but when it comes to enterprise websites, careful planning and expertise are required to make sure everything goes according to plan.”
Katie Stapley, VP of Client Success at BigScoots
If you’re on our Enterprise Hosting for WordPress plan, your site may have very specific architecture requirements which make your migration more complex. For these high-traffic sites, we handle the migration process in-house with complete control. Our experts take care of the entire migration, ensuring that every detail is covered – especially when it comes to performance, security, and custom infrastructure needs.
With enterprise-level migrations, we ensure it’s fully optimized for its new environment. From resource allocation to database handling, we work directly with you to make sure your site is set up for future growth and scalability.
Get your free WordPress migration started today
We’ve walked you through how to migrate your WordPress site manually, but if you’re running a high-traffic site, the easiest and most reliable option is to let your hosting provider handle the migration for you. After all, as the very wise old tech gurus say, “Why do all the work when you can have a trusted partner do it for you?” (True story, don’t bother Googling it.)
With BigScoots, all plans come with free migrations, so you can sit back, relax, and let us handle everything. For our enterprise clients, we also offer free consultations to make sure we understand your needs and set up the perfect solution.
If you’re an agency, the BigScoots Migrator gives you the flexibility to migrate websites on your own, with no technical knowledge needed. But if you’d rather leave it to the experts (like us), we’re happy to take it off your hands. Whatever suits you!
So, if you’re ready for a smooth, stress-free migration, BigScoots has got your back. You can either use the BigScoots Migrate plugin to handle the process yourself or, if you’d prefer, our team can take care of the migration for you. For our Enterprise clients, we’ll build out a custom infrastructure tailored to your needs, making the expertise of our team crucial to ensure your migration goes smoothly.
Let’s get your site moved and set it up for future growth! Get started with BigScoots Managed Hosting for WordPress today.


