While Squarespace offers solid plans for businesses looking for simplicity and built-in tools, it can feel restrictive if you need more flexibility, especially when handling high-traffic sites, large product catalogs, or complex workflows. For businesses that need deep customization and control, WordPress is the platform that provides all that and more.
That said, migrating from Squarespace to WordPress isn’t necessarily the easiest thing in the world. Content doesn’t always transfer perfectly, and some elements may need a bit of extra attention. But you’ll be pleased to know it can be done, and we’ll walk you through the process step by step.
Although the migration process can be somewhat challenging, the rewards are worth it. Once you’re on WordPress, you’ll have greater control, flexibility, and the ability to scale as your site grows!
Preparing your WordPress environment for migration
Before diving headfirst into the migration process, it’s so important to establish a solid WordPress foundation. The hosting provider you choose impacts the success of your migration and the performance of your website in the long run.
If you skip this step or opt for a budget host, you might face significant migration failures, including excessive downtime and poor site performance once the site is live.
When you migrate from Squarespace to WordPress, you’ll likely want to maintain the convenience of having someone else handle uptime, security, and performance. Squarespace takes care of all these technical aspects for you. To keep this hands-off approach with WordPress, choose a managed WordPress host rather than a basic hosting plan. This way, your hosting provider becomes your new technical safety net.
And there’s no net safer than BigScoots.
At BigScoots, we provide an environment tailored for high-performance sites, from our Managed Hosting for WordPress plans to the highly customizable Enterprise Hosting for WordPress. By owning our infrastructure in-house, we can allocate the necessary resources to meet the demands of your site, no matter its scale.
BigScoots’ deep integration with Cloudflare provides fast and reliable content delivery through an edge-first caching architecture. This significantly boosts your site’s performance, no matter where your customers are located. Plus, with 24/7/365 support and an industry-leading 90-second response time, you can count on our team to be there when you need them most.
Most hosts shy away from cross-platform migrations, but at BigScoots, we’re more than happy to help with your move from Squarespace to WordPress. Whether it’s installing your theme, configuring permalinks, pointing your domain, or anything else, we’ve got you covered!
How to export your Squarespace content
The first step in moving your site from Squarespace to WordPress is exporting your content. Squarespace lets you export a WordPress-compatible file, but there are a few quirks to keep in mind. Here’s how to get it done:
- Stay logged into your active Squarespace site. Make sure your site is live and accessible. You’ll need this to ensure you can grab everything you need.
Go to Settings → Advanced → Import/Export. Click Export, then choose the WordPress option when prompted. - Pick your primary blog. If your site has multiple blog pages, Squarespace only exports one, so you’ll be asked to choose which blog to include.
- Wait for the export to finish. This can take a few minutes, especially for larger sites. Once it’s ready, hit Download to save your .xml file somewhere easy to find.
This file contains your layout pages, blog posts, up to 1,000 comments per post, and basic blocks like text and images. However, not everything will make it:
- ❌ No product data (store pages won’t export).
- ❌ No custom CSS or style settings.
- ❌ No events, cover pages, or portfolio pages.
- ❌ Only one blog and basic content blocks (not things like video or audio).
Also, keep in mind: Squarespace doesn’t host your images permanently. If you’re importing into a self-hosted WordPress site, images might appear as external links. Once you cancel your Squarespace plan, those images could break. The safer option is to manually download and re-upload images to your WordPress media library.
If your Squarespace site has already expired, you might need to reactivate your subscription before you can export anything.
Understanding what content transfers and what doesn’t
| ✅ What transfers successfully | ❌ What doesn’t transfer or transfers poorly |
| Basic blog posts: All your blog posts, including text and basic formatting, will be exported. | Product information and eCommerce data: Product pages and customer data will not transfer, so manual entry may be needed. |
| Pages: Most standard pages will transfer, though formatting may be affected. | Image galleries and complex media: Gallery pages and media arrangements are difficult to migrate. You may need to manually upload images and videos to WordPress. |
| Categories and tags: These will be exported as part of your blog posts. | Custom CSS and design elements: Custom styling, such as CSS and certain design features, will not be included in the export. |
| Authors: Author information will transfer, making it easier to organize content. | Forms and form submissions: Squarespace forms will not transfer, requiring you to rebuild them in WordPress. |
| Basic text formatting: Simple text formatting like paragraphs, headings, and lists will be retained. | Squarespace-specific blocks and layouts: Features like portfolio pages, event pages, and custom layouts won’t export properly. |
| Audio and video files: Embedded or hosted audio/video files will not carry over. | |
| Password-protected pages: Content behind password protection won’t transfer. | |
| Member areas and subscription content: Subscription or member-only content will not be included. | |
| Comments: While comments may transfer, they can sometimes be inconsistent, especially with larger posts. |
Importing and organizing your content in WordPress
Once you’ve exported your content from Squarespace, you need to import it into WordPress. Here’s how (and don’t worry, you don’t have to be super techy!):
- Log in to your WordPress admin dashboard: Begin by logging into your WordPress site’s admin area.
- Access the Import Tool: In the left-hand menu, go to Tools and select Import.
- Install the WordPress Importer: If you haven’t already installed it, find the WordPress importer option and click Install Now. Once installed, click Run Importer.
- Upload the Squarespace XML File: You will be prompted to upload the .xml file you exported from Squarespace. Select the file and click Upload file and import.
- Assign Authors: During the import process, WordPress will ask you to assign authors. This is especially important for multi-author sites, so ensure that each post is attributed to the correct author. If the authors don’t exist in WordPress, you can create new ones.
- Import Attachments: You’ll also have the option to import attachments (such as images). Note that this step may not always work perfectly, especially for images linked externally from Squarespace. If you choose to import them, make sure to double-check later to ensure everything transferred correctly.
- Click Submit: After configuring the author and attachment options, click Submit to begin the import process.
Frustratingly, stuff can still go wrong, even with the WordPress Importer:
| What happens | Solution | |
| File size limitations | If your XML file is too large, your server might hit memory limits during the import, resulting in an error like “Fatal error: Allowed memory size exhausted.” | Ask your hosting provider to increase your memory limits in the php.ini file. If you can’t do that, consider splitting your large file into smaller parts to avoid the issue. |
| Missing images | Images often come over as links to Squarespace servers. When you deactivate your Squarespace site, these links break, and the images won’t show up. | Manually download images from Squarespace and re-upload them to your WordPress site. For quicker uploads, you can use plugins like Auto Upload Images, but keep in mind that it’s not always perfect. |
| Formatting issues | The formatting may not transfer smoothly. You might find strange text, broken lists, or weird spacing. | After the import, you may need to go through your content and adjust formatting manually. Use WordPress’s text editor to clean up any rogue formatting, especially headings and paragraphs. |
Once the import finishes, it’s time to make sure everything looks right. Here’s how you can verify your content was imported correctly:
Posts and pages
Go to Posts → All Posts and Pages → All Pages to see if all your content is there. Look for any posts or pages that might have been missed.
Categories and tags
Go to Posts → Categories and Posts → Tags to make sure they transferred correctly. This will help you organize your content into logical groups.
Media attachments
Go to Media → Library to verify that your images, videos, and other media files have been uploaded correctly. If any media is missing or showing broken links, you may need to upload them manually.
Once the content is imported, it’s time to tidy things up and make your WordPress site work smoothly. Here’s how to get everything organized:
Create logical category structures
Organize your posts into relevant categories to make navigation easier for your readers. This can be done by going to Posts → Categories and adding new categories as needed.
Set up menus
Go to Appearance → Menus to set up your site’s navigation menu. This should closely resemble (or improve upon) the Squarespace menu. Add pages, categories, and custom links to create a user-friendly navigation experience.
Fix broken links
Use a plugin like Broken Link Checker to find and fix any broken internal links. This ensures a smooth user experience and helps with SEO.
Check formatting
After importing, go through your posts and pages to ensure the formatting looks good. Check that headings, paragraphs, and lists are properly aligned and display correctly.
Migrating images, videos, and custom content from Squarespace
Handling media and custom content can be one of the trickiest parts of migrating from Squarespace to WordPress. While the export process takes care of your basic content, images, videos, and other custom elements may require extra attention.
Here’s how you can manage:
Images
- Linked images: These often transfer as links to Squarespace servers. When you deactivate your Squarespace site, these links will break, and the images will disappear from your WordPress site. To avoid this, you’ll need to manually download the images from Squarespace and upload them to WordPress through Media → Add New.
- Auto Upload Images plugin: Some use this plugin to download and host linked images, but we don’t recommend it as it hasn’t been tested with recent WordPress versions, so it might not work perfectly.
- Image quality: Be mindful that transferring images manually may cause slight quality loss. Always double-check to ensure the images look good on your new site.
Videos
- Embedded videos: YouTube or Vimeo embeds will transfer smoothly as their embed code is included in the export. For videos hosted directly on Squarespace, you’ll need to manually download them and upload them to WordPress or use a third-party host like VideoPress for seamless integration.
- Video hosting alternatives: If you need a more scalable solution, consider using video hosting services like YouTube, Vimeo, or VideoPress for smooth playback.
Custom content
- Forms: Squarespace forms won’t transfer, so you’ll need to rebuild them in WordPress using plugins like Contact Form 7 or WPForms.
- Galleries and portfolios: Recreate custom galleries using plugins like Envira Gallery or FooGallery, or select a WordPress theme with similar functionality.
- eCommerce: For product data, you’ll need to migrate to WooCommerce. The process can be complex, especially for sites with large catalogs, but it’s necessary to manually set up product categories, attributes, and images.
Setting up permalinks and pointing your domain to WordPress
Once your content is imported from Squarespace to WordPress, it’s time to configure permalinks and point your domain to your new WordPress site.
Permalinks are the URLs used to access your posts and pages in WordPress. They are essential for both search engines and users to navigate your website easily. Consistent and SEO-friendly URLs help search engines index your site correctly and make it easier for users to find content.
To set up SEO-friendly permalinks:
- Log in to your WordPress admin dashboard.
- Go to Settings → Permalinks.
- In the permalinks settings, we recommend selecting the “Post name” structure. This structure uses clean, descriptive URLs (e.g., www.yoursite.com/sample-post) that are much better for SEO compared to ones with dates or numbers.
While setting up permalinks, try to match the URL structure from Squarespace as closely as possible. This helps preserve SEO rankings and minimizes broken links. Even small URL changes can impact your search engine rankings, so it’s important to maintain consistency in your site’s structure.
Despite carefully setting up your permalinks, some URLs may still change during the migration, which is why we need 301 redirects! A 301 redirect ensures that visitors and search engines are automatically redirected from the old Squarespace URL to the new WordPress URL, so you don’t lose any traffic.
We recommend using the Redirection plugin to manage 301 redirects easily. This plugin will allow you to set up and track redirects, ensuring that all your old Squarespace URLs point to the correct pages on WordPress.
After setting up permalinks, the next step is pointing your domain to WordPress. There are two main options for managing your domain:
Pointing your domain while keeping registration at Squarespace
- Access Squarespace’s domain settings.
- Update the nameservers to point to BigScoots.
- Expect the domain changes to take about 24-48 hours to propagate.
Full domain transfer to a new registrar
- Unlock your domain in Squarespace.
- Obtain the authorization code.
- Initiate the domain transfer to your new registrar.
If you need assistance with domain management, BigScoots’ migration services include domain transfer support, ensuring a smooth transition.
It’s important to note that your site’s traffic will remain uninterrupted during the migration process as long as your Squarespace site remains active. After we complete the migration and DNS adjustments, you can safely take down your Squarespace site and cancel the service.
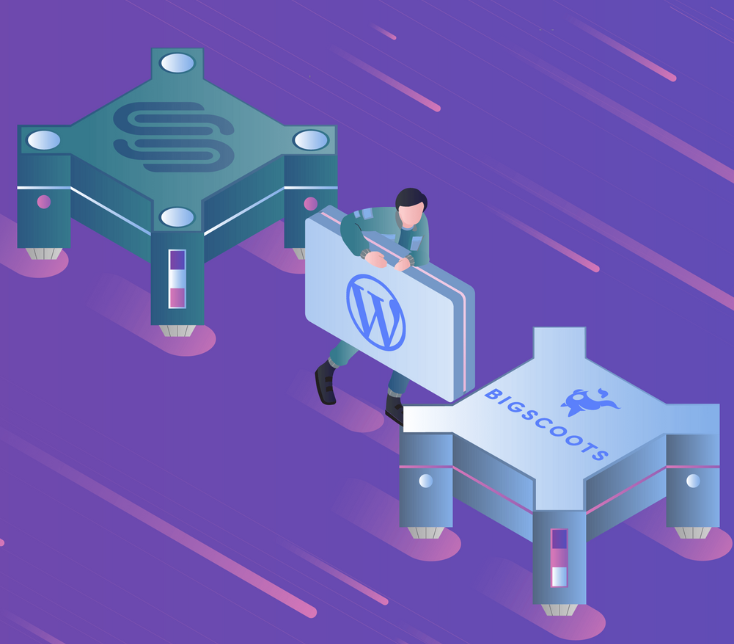
Let BigScoots handle your Squarespace to WordPress migration
Choosing to migrate from Squarespace to WordPress with BigScoots means avoiding the common challenges of DIY migration.
With BigScoots, you don’t have to tackle it alone. All of our Managed Hosting for WordPress plans come with unlimited free migrations – a service most hosts don’t provide. Our team handles everything for you, meaning all content types – including blog posts, images, videos, and more – are transferred to WordPress. We take care of the heavy lifting, so you then just need to swoop in and handle any custom elements that cannot be transferred, such as your site design and custom product data.
We also make sure your SEO rankings are protected throughout the process, with zero downtime. Your site will stay live while we handle the migration behind the scenes. And with our 24/7/365 support and an industry-leading 90-second response time, we’re always here to assist when you need us most.
By choosing BigScoots, you’ll save time, simplify the process, and preserve your content and SEO integrity, all while benefiting from expert support.
Ready to migrate without the hassle? Explore BigScoots’ Managed Hosting for WordPress and let us handle the migration for you!